Did you know that mini split systems can improve energy efficiency by up to 30% compared to traditional HVAC systems? If you’re considering installing one in Decatur, GA, you’re making a smart choice for comfort and savings. Nevertheless, the installation process can be a bit intimidating without the right guidance. Let’s investigate the crucial steps you need to follow to guarantee your mini split system operates efficiently and effectively with help from trusted mini split installation services in Decatur, GA.
Understanding Mini Split Systems and Their Benefits
When you’re looking for an efficient way to heat or cool your space, understanding mini split systems can be revolutionary.
These systems consist of an outdoor unit and one or more indoor units, allowing you to control the temperature in individual rooms. This zoning capability means you can save energy by only heating or cooling the spaces you use.
Mini splits are additionally known for their quiet operation and compact design, making them perfect for homes with limited space or for those who prefer a sleek look.
With easy installation and no need for ductwork, mini split systems can be a practical choice for both new constructions and retrofits.
Plus, many models come with energy-efficient features, helping you reduce utility bills. In fact, homeowners in Decatur, GA, have reported significant savings on their energy bills with efficient ductless mini split systems tailored to their needs.
Preparing for Installation: Tools and Materials Needed
Before diving into the installation of your mini split system, it’s vital to gather the right tools and materials to guarantee a smooth process.
Having everything ready will help you avoid unnecessary delays and frustrations.
Drill and drill bits: For making holes in the wall for the lines and mounting brackets.
Level: To verify your indoor and outdoor units are properly aligned.
Pipe wrenches: Fundamental for connecting refrigerant lines.
Refrigerant gauge set: To check the system’s pressure and verify proper function.
Additionally, consider the benefits of routine maintenance and inspections to ensure your system operates efficiently over time with professional HVAC installation expertise.
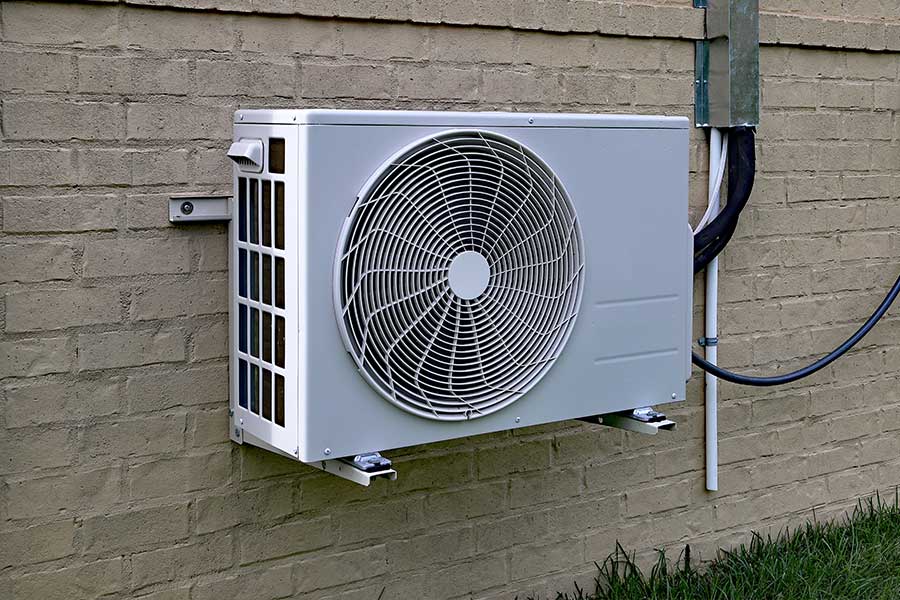
Choosing the Right Location for Your Indoor and Outdoor Units
How do you guarantee peak performance from your mini split system? It starts with choosing the right location for both indoor and outdoor units.
For indoor units, select a spot that allows for ideal airflow and even temperature distribution. Avoid areas near obstructions like furniture or curtains, and ideally, mount the unit high on the wall for better efficiency.
For outdoor units, place them in a shaded area if possible to prevent overheating. Verify there’s ample clearance around the unit for airflow—at least a couple of feet on all sides.
Avoid locations close to walls or fences that might obstruct airflow. Additionally, consider the noise level; positioning it away from bedrooms or living spaces can improve comfort.
Proper placement not only boosts efficiency but also extends the lifespan of your mini split system, especially when paired with professional ductless HVAC installation.
Step-by-Step Installation Process
Installing a mini split system involves several key steps that guarantee efficiency and proper functionality.
Mount the indoor unit: Securely attach it to the wall, ensuring it’s level and within reach of the power source.
Install the outdoor unit: Place it on a stable surface, allowing for proper airflow and clear drainage.
Connect refrigerant lines: Carefully run the insulated lines between the indoor and outdoor units, ensuring no kinks or leaks.
Set up the electrical connections: Wire the indoor unit to the power source and connect it to the outdoor unit.
Once you’ve completed these steps, you’re well on your way to enjoying your new mini split system. Additionally, consider consulting experienced HVAC technicians to ensure optimal results.
Testing and Maintaining Your Mini Split System After Installation
After completing the installation of your mini split system, it’s important to verify everything operates smoothly and efficiently.
Start by turning on the unit and checking for any unusual noises or vibrations. Ascertain that the remote control functions correctly and that the temperature settings are accurate.
Next, inspect the refrigerant lines for any leaks and confirm that the drain line is clear.
It’s additionally vital to check the air filters regularly; cleaning or replacing them every few months keeps the system running efficiently.
Schedule annual maintenance with a qualified technician from Ace & A Heating & Air Conditioning to guarantee peak performance and longevity.

Conclusion
Installing a mini split system in Decatur, GA, can feel like a refreshing change. By following the steps outlined, you’ll create a comfortable oasis in your home. Remember, it’s not just about the installation; regular maintenance keeps your system running smoothly and efficiently. So, roll up your sleeves and plunge into it—before you know it, you’ll be enjoying the perfect climate, all thanks to your hard work and planning!